Let´s create together.  
Edit Content
find a plant

Search by name or category

Lorem ipsum dolor sit amet, consectetur adipiscing elit. Ut elit tellus, luctus nec ullamcorper mattis, pulvinar dapibus leos.

Peas

Peas

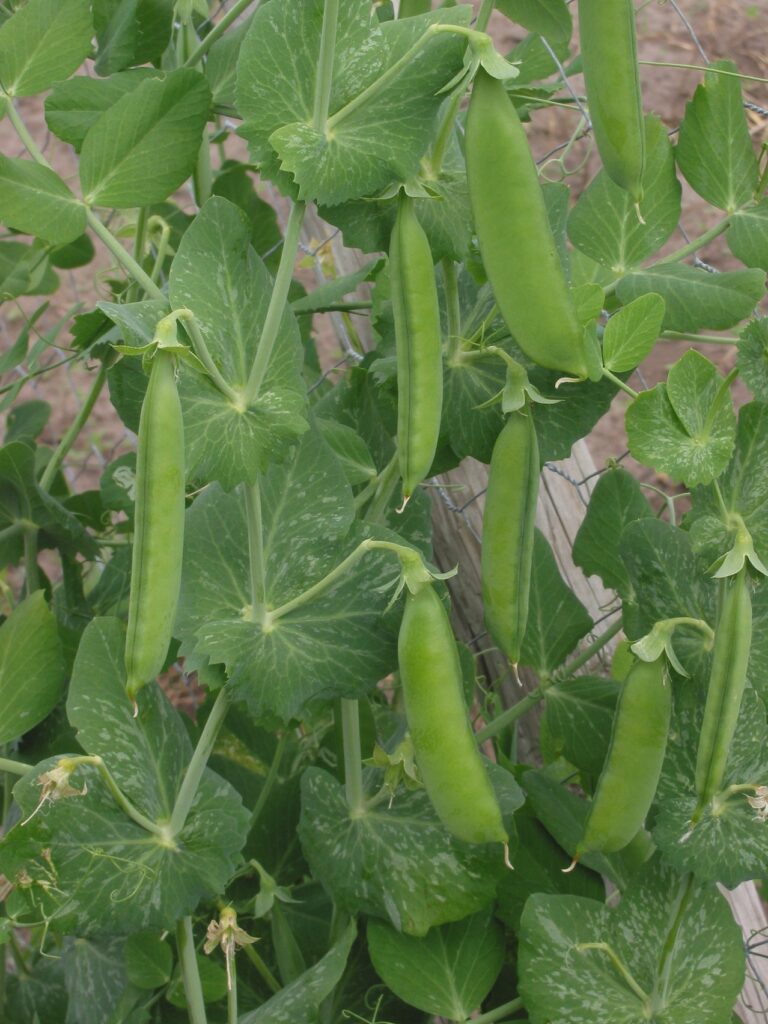
Cultivated annual plants having compound leaves with terminal leaflets modified into tendrils and edible seeds enclosed in an elongated pod. Commonly grown peas include English peas, snow or sugar peas, and sugar snap peas available in both bush and climbing varieties. There are also black-eyed, crowder (field), and chick peas (garbanzo). Legumes (lentils) are also of the pea family.

Introduction
Mr. John Doe

Head Director

Description

Optimal Time/Temperature for Germination:
One method is to moisten a paper towel and fold it into quarters. Slide pea seeds into the paper towel’s folds. Place the seeds in a warm location, such as a sunny windowsill, with a temperature of approximately 64°F (17.8°C). Monitor the moisture level of the paper towel and pea seeds, adding water as needed to ensure a humid environment. Watch for shooting out roots. Peas have delicate roots and don’t tolerate being transplanted from pots well so it’s best to grow them from seed directly in the garden. Sprinkle the newly germinated peas on upturned soil and cover or net for pests (birds like the sprouts). Should you plant seed before germination and depending on the type of peas you’ve planted, expect the first sprouts to appear within 1 to 2 weeks in the ground. Most peas prefer full sun. Observe your yard throughout the day, and note which areas get good sunlight. Since afternoon sunlight can be intense, go for a spot that gets lots of light in the morning, but is partly shaded later in the day. Optimal temperatures for pea plant growth in the outdoor garden range from 65 to 75°F (18.3 to 23.8°C).
Optimal Soil Conditions:
An ideal pH for pea plant growth is 5.5 to 6.5. (you should add an acidifier to your soil at least 3 months before planting to ensure it has time to take effect.) The most accurate way to test soil temperature is with a soil thermometer, which is an inexpensive tool available at most garden centers. Insert the thermometer about 3 to 4 in (7.6 to 10.2 cm) into the soil to take a reading. You could also use average air temperatures to estimate soil temperature. To find an average air temperature, add together a day’s high and low temperatures, then divide by 2. Find the average air temperature for the last 3 days. The soil temperature should be roughly equal to that number. Using this strategy, you can use forecast temperatures and predict when the soil will be warm enough to plant. In general, the best time to plan is mid-spring, or mid-May for temperate climates in the Northern hemisphere. To test pH, mix 1 part each of soil and distilled water, insert a test strip into the mixture for 20 to 30 seconds, then compare the strip’s color with the kit’s color key. Beans and peas need slightly acidic soil. If your soil’s pH is greater than 6.5, add an acidifier, such as sulfur. If your soil is too acidic, add an alkaline amendment, such as lime. Apply mulch to peas grown in high-temperature areas to cool the soil and reduce water loss. Peas fail to germinate well in very cold or overly warm soil. Use a hoe or garden spade to dig into and turn over the soil. Lightly water the soil beforehand to make it easier to till. Turn all of the soil in the area where you plan on planting your vegetables. Beans and peas thrive in well-draining soil. If you have dense soil, add at least 10 to 15 lb (4.5 to 6.8 kg) of sand or well-aged manure and compost when you till. Try digging a shallow hole, then water it for about a minute with your hose. If the water sits in a puddle and doesn’t really drain, you’ll need to amend it with organic matter or sand. You can also pick up a handful of soil and form it into a ball. If it holds a compact shape and doesn’t crumble much, your soil is dense. Peas prefer soil that is fertile, well drained and high in organic matter.
Seed Planting Depth, Spacing and Procedure:
Plant 2 to 3 oz. (56-to-85 g) of seed for each 100 feet (30 m) of row. Push your finger into the soil, pull it out, then place a seed into the hole. Plant your seeds in rows; if you have multiple rows, leave about 2 to 3 ft (61 to 91 cm) between them. Plant pea seeds 3 inches (7.6 cm) apart. Climbing varieties need the support of poles, bean teepees, trellises, or a face. Insert individual 6 foot (1.83 m) bean poles into the soil by each seed hole, or tie bamboo sticks together to construct teepees. Don’t cover the planted seeds with soil until you’ve added the supports. The holes will help you keep track of where to place the supports because peas have sensitive roots so you’ll need to erect the supports when you plant the seeds. Doing so after they’ve sprouted could injure your plants. Fill in the holes, then press down gently on the soil where you planted each seed. You don’t want to pack the soil; just pat it down with your hand to encourage germination. Water the planting site just enough to get the soil moist but it shouldn’t be waterlogged. Check your soil’s moisture daily, and avoid letting it become dry. Since too much moisture discourages germination, just get the soil damp, and don’t water it before planting as you might with other kinds of plants. Additionally, avoid planting bean and pea seeds right after heavy rain.
Best Companion Plants and Plants that Hinder:
Do not grow onions in with peas and beans. However scattered chamomile is helpful to ailing garden plants.

Growing Instructions

Crop Maintenance

Moisture Requirements & Solutions:
Monitor pea plants for flower drop or stringy pea pods. These are signs of too much heat and/or not enough water. Peas are prone to a few diseases, but watering moderately and keeping foliage dry can help ensure your plants stay healthy. To test the soil, push your finger into the ground. If the soil feels dry and doesn’t stick to your finger, it’s time to water your plants.
Weeding Needs & Solutions:
For permanent plantings, you can lay down landscape fabric over the soil and mulch to act as a weed barrier but not mulch right at the base of the plant.
Feeding Needs/Optimal Natural Fertilizers:
Peas don’t require much fertilizer, and they can absorb nitrogen from the air. Frequent or heavy applications will lead to abundant foliage, but fewer pods. Since beans and peas can extract nitrogen from the air, avoid using a nitrogen fertilizer. Too much nitrogen will lead to fewer pods. Legumes don’t need a lot of fertilizer, but a light application after they’ve spent lots of energy to bloom can help sustain their growth.
Pests, Diseases & Solutions:
Any spraying mixture that contains cayenne, cinnamon, cloves, pepper, liquid dish soap, or rosemary as a main ingredient is the best defense against aphids. This will also help you fight ants, aphids, and gnats: Peel one orange and add the peels to two cups of water. Boil this and let it sit overnight. Add a 1/4 teaspoon of castille soap and stir. Strain out the orange peels and add the mixture to a spray bottle. Wet bean and pea leaves can promote disease. To best way to prevent disease is to keep your plants’ foliage as dry as possible. Water earlier in the day so the sun can dry any moisture on the leaves, and don’t prune leaves or harvest pods when your plants are wet. Watch pea crops for pea aphids, army worms and cutworms, pea weevils, fusarium wilt, pea enation mosaic (virus transmitted by aphids), powdery mildew, root rot and damping off. Check your plants regularly for insect larvae, beetles, slugs, and other pests. If you only find a few here and there, just pick them off of your plants. Inspect your plants regularly for white fuzz, discolored spots, and other signs of disease. If a branch is affected, cut it off, throw it away, then wash the nearby foliage with soap labeled for plants. If fuzz or mold is all over a plant, pull the plant up and throw it away. Nasturtiums lure away aphids and marigolds ward off pests and even nematodes and beetles.
When to Harvest/Number of days to maturity:
Peas usually take 50 to 70 days from germination to harvest. Consider staggering your planting if you plan on growing lots of plants. For instance, plant 5 one week, another 5 a few weeks later, then another 5 a few weeks after that. You’ll space out your crop instead of getting overwhelmed with a big harvest all at once. You should have your first harvest about 2 months after germination. For legumes with edible pods, such as sugar snap peas and green beans, it’s best to pick the pods before the seeds inside fully develop. The pod should be crisp, firm, and tender, and the seeds inside should be small and immature. Field peas like the dry beans should be left until the seeds develop completely. They’ll be ready to harvest when the pod easily opens. Avoid harvesting pods while the plant is wet. Wait for morning dew to evaporate to pick pods, and don’t water them right before harvesting. Start the process all over again, and replant pea garden next year. Wet seeds will go bad, so don’t wash the seeds before storing them. For best results, choose another spot in your garden for next year’s crop. Don’t grow in the same spot 2 years in a row. Rotate crops each year to prevent soil exhaustion and disease. Some bush types may ready in 8 weeks, while other types can take as long as 20 weeks to reach the harvesting stage. If you are purchasing seeds, be sure to check how long they take on the packet. For edible pod legumes, the more pods you pick and the sooner you pick them, the greater your yield will be. The right time to pick pods depends on the species, so check online or read seed packages to find out when to harvest for your specific varieties.
How to Harvest:
Optimal Storage temperature and conditions:
Shell the peas with helpers to work quickly, rinse and transfer the peas to blanching, as peas start losing their freshness once exposed to air and the skins toughen. If you don’t have helpers, shell only a few at a time, blanch, then shell some more, blanch those ones, etc. BLANCHING Bring a large pot of water to the boil. Fill a large bowl with ice cold water and toss in a few ice cubes. Set to one side for dunking the peas into once blanched. If you are doing a lot of peas, you’ll need to blanch them in batches. The peas should be kept inside a colander with handles that overlap the pan or in a muslin/other cloth bag and lowered into the boiling water. Otherwise, you’ll find it really hard to retrieve them all fast enough when the blanching time is up. Blanch for 3 minutes. Keep an eye on the pot in case it tries to boil over. Remove the peas and plunge them straight into the bowl of ice water to stop cooking instantly. Drain and the faster the peas get to the freezer, the greater the chance of them staying fresh and whole. If they stand too long at room temperature, they risk turning mushy. Place the blanched peas into resealable bags or suitable freezer containers. Pack them in as tightly as you can, to eliminate the air space. Leave about 1/2 inch (1.25 cm) at the top to allow for expansion during freezing. Gently press down to remove excess air from the packages. Pouring ice cold water over the outside of the package can help eliminate more air. Seal, label and date. Use the same procedures for the storing of podded peas except remove the tips and strings and then blanching 1 minute for thin snow peas and 1 1/2 to 2 minutes for juice sugar snap pea pods instead.
Optimal Preserving Procedures:
Seed Saving:
Let some of the pods to mature until they’re just about ready to fall off naturally. Open them up and collect the seeds, then store the seeds in a cool, dry place until next spring. (old pea seeds may not germinate as well or at all so sow last year’s left over seeds more thickly than directions call for.)

Harvest and Storage

Notes

From the same Category

0 0 votes
Article Rating
Subscribe
Notify of
guest
0 Comments
Oldest
Newest Most Voted
Inline Feedbacks
View all comments

Contact to Listing Owner

Captcha Code
0
Would love your thoughts, please comment.x
()
x