Let´s create together.  
Edit Content
find a plant

Search by name or category

Lorem ipsum dolor sit amet, consectetur adipiscing elit. Ut elit tellus, luctus nec ullamcorper mattis, pulvinar dapibus leos.

Pear Tree

Pear Tree

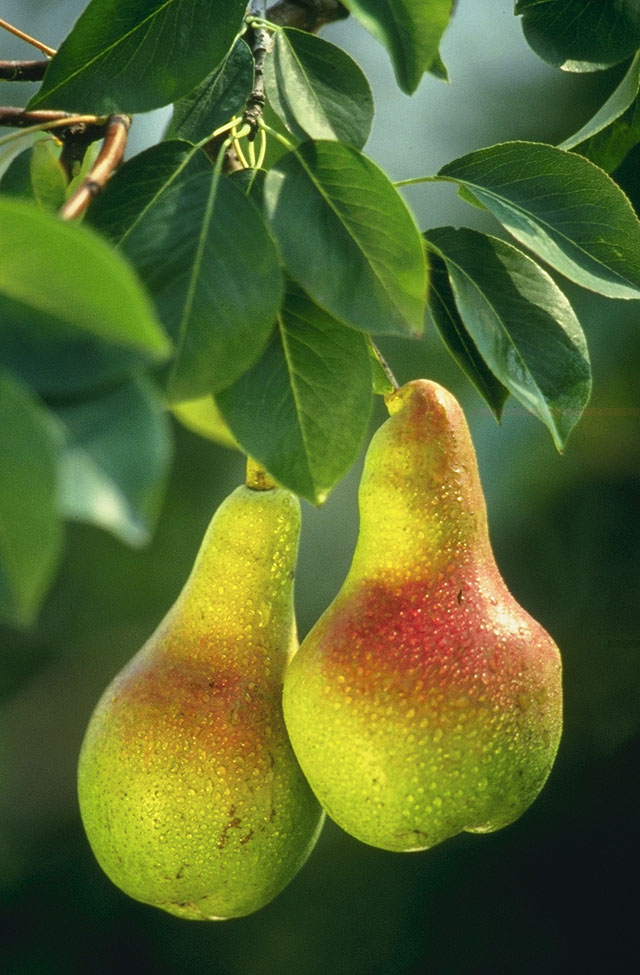
A tree of the genus Pyrus, in the family Rosaceae which bears the pears as fruits having a sweet gritty-textured juicy fruit. The trees usually live 50 years, although they might have shorter or longer life spans depending on how well cared for they are. It’s one of the most important fruit trees in the world, the common pear is cultivated in all temperate-zone countries of both hemispheres.

Introduction
Mr. John Doe

Head Director

Description

Optimal Time/Temperature for Germination:
Fruit seeds germinate best in the late winter or early spring. By collecting the seeds you want to plant in February, you give yourself enough time to stratify them. Stratification aids in germination and will produce more seedlings. Soak the seeds in a bowl of water overnight. If any seeds float to the top, get rid of them. If they sink to the bottom, they are good to grow. In the morning, remove the seeds. Mix 10 parts water to one part bleach. Soak the seeds in the bleach mixture for 10 minutes before rinsing thoroughly. Fill a resealable plastic sandwich bag with the moss and mix in water. The moss should be damp, but not waterlogged. Moist potting soil will also work here, but may need to be watered more often than the moss. Push the seeds 2 to 3 inches (5.1 to 7.6 cm) into the moss. Bury at least 4 of the pear seeds in the moss before sealing the bag. The more seeds you place in the moss, the more chance you have at a successful germination. Store the bag in the refrigerator for 60-90 days. This gives the seeds time to chill and start the germination process. The peat moss should hold the moisture through this period, but you may have to check on it every 2 weeks. If the peat moss has dried, use a spray bottle to moisten it again. After 3 months pass, you can remove the seeds from the fridge. If there is no risk of frost or the temperature does not drop below 40°F (4°C), you can remove the seeds from the fridge earlier. Plant 2 pear trees at a time, unless there are nearby pear trees beside yours, so the trees can cross-pollinate and bloom. Try to pick out two different kinds of pear trees; it is beneficial if your pear is pollinated by a different cultivar that flowers at the same time. Choose a fire blight resistant variety that will thrive in your local climate. If you plant a pear tree that doesn’t do well in your area, you will most likely have a sick tree on your hands, no matter how well you take care of it. Hardiness zones are 3 to 10 which means that they can survive in areas where the winter temperatures dip to -40 to -35°F (-40 to -37.2°C).
Optimal Soil Conditions:
Find an area with well-drained soil and 6 hours of sunlight. Well-drained soil and full sunlight will give your pear the best growing conditions. When it rains, check the area for standing water on the surface. If there is puddling, you may want to select a different planting location. To test the drainage of your soil, dig a hole 1 foot (30 cm) wide and 1 foot (0.30 m) deep and fill it with water. Measure the depth of the water each hour. If it drains 1 to 3 inches (2.5 to 7.6 cm) each hour, the soil is well-draining. Roots spread over time, so keep that in mind as you select a planting location. Keep the tree away from important structures or other plants that will need a sufficient amount of water. Since pears like a pH between 6.0 and 7.0, they like a slightly acidic soil.
Seed Planting Depth, Spacing and Procedure:
Fill a plastic cup with potting soil and plant the seeds 1⁄2 inch (13 mm) deep. Keep the seeds an even distance apart when you plant them. If you are planting 4 seeds, imagine the cup to be a clock and plant the seeds at the 3, 6, 9, and 12 positions. Stick a toothpick next to each seed to mark where each seed is growing. Water the seeds until the soil is damp to the touch. Make sure not to over-water the cup or else the seeds will become waterlogged. In 2 or 3 weeks, you should start to notice seedlings through the top of the soil. The seedlings should be kept in a bright and warm area, like a windowsill, so they can grow. Remember that the more light a plant gets, the more water the plant will need. The first “leaves” that you’ll see on your seedlings are cotyledons and not true leaves. True leaves will develop over time and will resemble leaves from a fully grown pear tree. Once there are at least 4 true leaves on your seedling, they are ready to transplant. If you want to keep the humidity of your seedlings higher, you can loosely cover the cup with plastic wrap. This will help the soil retain its moisture for longer. Use a ruler or transplanting tool to dig the seedlings out from the cup, being sure not to damage their root structure. Once you have unearthed a seedling, put it in a hole slightly larger than the root ball and fill in the topsoil. At this point, you can keep seedlings indoors or outdoors depending on the weather. If there is harsh sunlight, it may be best to keep your plants indoors until they develop further. If the seedling grows too big for its pot, you can transfer it to a larger pot so you can still move it indoors or outdoors. Plant the seedling in May or June. Seedlings should be put in the ground early in the growing season so their roots have time to establish before winter. Selecting a day in late spring or early summer will give your seedling enough time. If you’ve had the seedlings growing in pots, there’s a good chance that some of the roots have started to twist around the trunk. Lay the seedling on its side and use sharp pruning shears to cut woody roots that are wrapping around the trunk. Alternatively, you can try to straighten out the roots by hand if you’re able to. Dig a hole 3 inches (7.6 cm) deeper and wider than the root spread. Give extra space for your seedling to grow helps the root system establish. Once you’ve dug the hole, you can fill it back in until the ground is level again. Plant trees at least 20 feet (6.1m) apart from one another. If they are full-size trees, both of them could reach up to 40 feet (12 m) in height and will need the space between them. Dwarf pear trees should be planted 12 to 15 feet (3.7 to 4.6 m) apart. Tying the trunk of the seedling to a wooden stake will help the tree grow straight. Use two stakes and flexible material wrapped in a figure-8 pattern around the trunk.
Best Companion Plants and Plants that Hinder:
best companion plants for pear trees are members of the allium family, lavender, dandelions, most herbs (especially borage), clover, mustard, nasturtiums, aster family flowers like African marigolds and chrysanthemums, and most important of all,other pear trees. They help by attracting pollinating insects, attracting bugs that eat pear tree pests, repelling pests, and providing nutrients and live mulch. There are no common herbs that “antagonize” your pear tree. There are a few that don’t grow well together (like basil and sage) and a couple that are invasive (like oregano), but with proper spacing, they will all benefit your pear tree. However, borage tops the list as a pear tree favorite. Black walnut and pecan trees are deadly to pear trees because they emit a chemical called juglone. Peppers can spread fungal diseases to fruit trees in general.

Growing Instructions

Crop Maintenance

Prune limbs with a sharp pair of shears. When branches break or leaves die, it’s time to prune your tree. Pruning should be done in the early spring right before growing season. Trim off any branches that are diseased or entangled with other branches. Cut as close to the base of the branch as you can. Branches should be 1 foot (30 cm) apart so fruit can grow across all branches. Don’t prune pear trees heavily but do prune them regularly. Prune when the tree is dormant and before the spring growth period starts. Dwarf pear trees need a different approach to pruning than standard-sized trees. Timing and method will vary depending on your variety. Always remove any crossing, rubbing, weak, dead, diseased, damaged or dying branches. Any growth should be burnt rather than placed in the compost bin so as to keep the disease from spreading.
Moisture Requirements & Solutions:
Water the plant once a week for the first year. In the beginning, your tree’s roots will not pull enough water for the tree to survive. Use a slow sprinkler to water your tree in the morning or evening when there is not direct sunlight. As the tree grows, its roots will be able to provide enough for the tree. Check the soil near your tree. If it still feels moist, you shouldn’t water your tree. Over-watering can cause damage as well. During a dry season, water your tree more often.
Weeding Needs & Solutions:
Mulch at a depth of 2-3 inches (5- 7.6 cm) in a 3 foot (91 cm) circle around your tree to prevent weed competition for nutrients and water.
Feeding Needs/Optimal Natural Fertilizers:
There’s no need to add fertilizer when you plant the seedling, but you can mix in peat moss or compost with the soil if you want. Later on, a once a year fertilizing should do. If the leaves are a pale green or yellow during summer, try more fertilizer the following year. If the tree grows more than 1 foot (30 cm) in one season, next season use less fertilizer.
Pests, Diseases & Solutions:
Small mammals like to chew the bark around the base of a tree, so wrapping a guard around it will add protection. Tree guards can be purchased at any home and garden store. After the bark starts to get rough or flaky, you can remove the guard. Tree guards also help protect the trunk from sunlight. Fire blight is an especial problem for pear trees and can severely damage or kill your tree. Affected trees look like they have been burnt. This disease is caused by insects that bring the disease to the tree. Take steps to prevent fire blight. To keep fire blight at by, select a pear variety that is resistant to the problem. Help your tree resist fire blight by keeping it well watered during the spring and summer; mulching will also help conserve water. Don’t prune your tree too heavily as new growth is more susceptible to fire blight than old. If your tree is affected, prune each affected bit of growth to at least three inches below where the damage is visible. Sterilize your cutting tool after making each cut. Brown rot is sometimes a problem in wet summers. You’ll see the fruit rot into a brown color with white patches. Dispose of the affected fruit. / Pear rust causes orange leaf spots; you just need to remove and burn affected growth as you would for fire blight. Pear leaf blister mite causes yellow or red leaf blisters that turn black. Again you just need to remove and destroy affected foliage; it’s still okay to eat the fruit.
When to Harvest/Number of days to maturity:
It will take at least 3 years for your tree to start bearing fruit, although they won’t produce a full crop for 5-7 years (could take up to 10 years). Dwarf trees usually produce fruit a bit earlier than standard-size trees, as do Asian pears.
How to Harvest:
Pull fruit when it starts to change color while it’s still hard. It will finish ripening as you store it indoors. Try to thin your tree’s fruit, leaving around 6 inches of space between each cluster of fruit on a branch. When possible, thin the fruit out by picking the ripe fruit from the tree; that way, both your tree and your belly stay happy and healthy.
Optimal Storage temperature and conditions:
Some pear varieties are better for cooking and some better for eating straight from the tree. Winter varieties are best suited to long-term storage. If you intend to store your pears for more than a couple of weeks, choose a winter pear such as an Anjou, Bosc, Comice, or Winter Nelis. Bartlett pears aren’t a winter pear, but they can be stored for long periods, too. Store your pears at 30°F (-1°C) (and at 85% to 90% humidity), or as close to it as you can get. Any colder than this, and the fruit will be damaged; any warmer, and it’ll ripen faster than you want. If you have a spare refrigerator (or you have extra space in your refrigerator), this is the ideal spot to stash your fruit. Bartletts will keep at this temperature for 2 to 3 months, winter pears for 3 to 5 months. Pears actually need to spend time in cold storage to ripen properly, so give your Bartlett pears at least 1 to 2 days in the fridge and your winter pears 2 to 6 weeks, before you even think about pulling any out. Try canning the pears, pear sauce, pear butter, or freezer jam.
Optimal Preserving Procedures:
Seed Saving:
Store-bought pears will work fine. Using a paring knife, cut a pear in half. Cut the halves into quarters so you can easily access the seeds in the core. Dig out the seeds with a spoon or with your finger. You should find about 8 seeds inside. Each pear is unique due to cross-pollination. If you want to plant more trees in the future that will bear the same fruit, you can store half of the seeds in a plastic bag in your fridge for 2 years. You can use pears straight from a pear tree too. Just make sure to harvest them for seeds in the summer when they are ripe.

Harvest and Storage

Notes

The 4 seeds from the plastic bag out of the refrigerator are going to be viable for a few years after opening, so save them for whenever you decide you want to grow more pear trees. No other pear seeds will match this unique cultivar, so that’s why you need to save four seeds from every batch. If you purchase bare-root plants then plant them quickly to keep them healthy. They need to be planted between the late fall and early spring. If you purchase a pear tree in a container with soil, try to plant the tree in winter if possible. If you are growing in a container, make sure you choose a variety intended for container growing. The tree must be grafted onto a rootstock that won’t grow too big for its container. Despite all the care you put into your tree, sometimes you just have to accept the weather can work against you. Late frosts and hail storms will dislodge buds, leading to poor fruit set. It’s difficult to protect against this. It’s also normal to see pear trees drop fruit in the summer. It’s especially likely if the tree is young or under pressure from lack of water or pest attack. Pear trees that receive too much water (heavy rains, flooding) can experience stunted growth, poor fruit yield and death. Over watering fills in air pockets around the roots, which the roots need to breathe and to absorb nutrients properly. Many over watering signs mirror the signs of drought, including wilting or falling leaves and an overall dull appearance. Asian pears, also known as apple pears or sand pears, are a healthy treat that combine the best qualities of apples and pears. These fruits are a crunchy, sweet member of the pear family, but they grow to be round like an apple. The Asian pear is often given as a gift throughout East Asia, due to its long shelf-life and delicious flavor.

From the same Category

0 0 votes
Article Rating
Subscribe
Notify of
guest
0 Comments
Oldest
Newest Most Voted
Inline Feedbacks
View all comments

Contact to Listing Owner

Captcha Code
0
Would love your thoughts, please comment.x
()
x