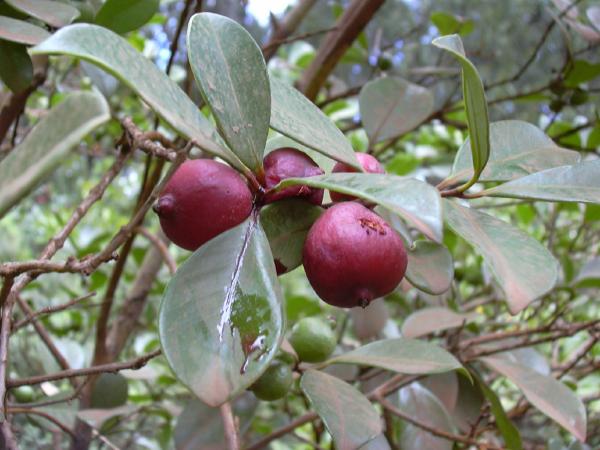
You’ll know when your fruit is ripe and mature enough to pick by the change of both its color and
texture. Color will change from green to yellow, and then the fruit will soften. These trees bear fruit
after two or three years from planting, ripening in August or September.
When picking guavas, look for fruit with a rough, green skin. These guavas aren’t yet ripe, which will
give you more time to enjoy them. Other gardeners will allow the fruits will fall off the tree to collect
them from the ground.
It’s a tropical fruit that tends to go bad quickly after
ripening. To prolong the life of your guava, you can refrigerate. P lace the entire fruit in a bag to protect
it in the refrigerator. Other fruits can give off gasses that encourage ripening, and the bag will ensure
that the guava is safe. Make sure the bag is clean and dry before putting the guava in it. Dirt and water
can cause the guava to ripen further in the refrigerator. Remember to label the bag with the date for
future reference. Be sure to set the crisper drawer to a medium humidity to ensure that the guava
doesn’t become too dry or too moist. Leave the bag open slightly at the top to let air circulate through
the bag and the drawer.
After 4 days in the refrigerator, the guava will be past ripe and should be thrown away. Over-ripe guava
will dent when you press on it. Your guavas should be soft to the touch and have a strong, heady scent
before you refrigerate them. If the guavas aren’t ripe yet, let them sit on the counter for 2-3 days until
the skin yields when you press on the fruit. Avoid placing guava near a window because the heat and
light can make it ripen too quickly. If the guava is taking a long time to ripen, try placing it in a paper
bag with the top slightly open.
To freeze it once it’s ripe, Rinse the guava under cool water and blot the fruit dry with a paper towel.
Then, use a knife or peeler to carefully remove all of the skin from each guava. You can dispose of the
skin, or you can place it in a compost pile with other food scraps. Be careful when using the peeler on
the guava. The small, rounded shape can cause the peeler to slip. On a cutting board, slice the guava
in half through the widest part in the middle of the fruit. You can cut the halves again to make chunks,
or leave them in halves to freeze. This will help the sugar in the simple syrup to permeate into the fruit
and keep it tasting sweet after the freezing process. Once the guava is cut, get a freezer bag or airtight
container with a lid. Make sure it’s large enough to fit all of the fruit with about 0.5 to 1 inch (1.3 to 2.5
cm) of empty space at the top of the container, called headspace.
The head space will allow for quicker freezing time, which keeps the guava fresh for a longer period in
the freezer. Simple syrup is a mixture of equal parts water and sweetening choice that is heated to a
boil to create a sweet syrup. Pour the cooled syrup into the container or bag until the guavas are
completely submerged, but remember to leave enough headspace in the container. If you’ve just made
the simple syrup, let it cool before pouring it over the fruit. Warm syrup can cook the guava, causing a
change in taste. Make sure the lid of the container is closed tightly or the bag is completely sealed.
Label the container or bag with the date and let it sit in the freezer undisturbed for at least 12 hours
before thawing. If you’re going to freeze the guavas for a long period of time, avoid placing them in the
door of the freezer. The door experiences more temperature changes than the rest of the freezer,
which can cause thawing. While guava can last in the freezer for long periods of time, the taste of the
fruit will deteriorate after a year. When you’re ready to use it, place the guava in the refrigerator for 2-3
hours to thaw before taking it out of the container. If you’re not sure how to use your frozen guava, you
can try making juice, baking guava-based pastries, or even whipping up a guava barbecue sauce.
Other options are to make jellies, jams, pies, and juice.
Propagation can be done through cuttings, and it is best to do this in the fall. To
propagate, you will need a sharp pair of garden snips, light soil, a small pot, and rooting hormone.
Then follow these instructions: a) Using the snips, cut a small softwood cutting from the bottom of the
shrub. A cutting around 10-12 inches is ideal. Be sure the cutting has some healthy leaves and a few
nodes on it. b) Remove any leaves on the lower section of the cutting. c)Dip the cut end into a rooting
hormone. Shake away the excess powder. d)Gently plant the cutting into a light soil mix, such as those
used for seed starting. A mix of peat, sand, or sawdust is also a good choice. Keep the cutting moist
and in bright sunlight. e) Roots should form in about two months and can be transplanted to the garden
at this point.


