Let´s create together.  
Edit Content
find a plant

Search by name or category

Lorem ipsum dolor sit amet, consectetur adipiscing elit. Ut elit tellus, luctus nec ullamcorper mattis, pulvinar dapibus leos.

Gourds & Luffa

Gourds & Luffa

Gourds come in dozens of species, each with its own unique shape, color, and size.
Gourds come in three general types: ornamental gourds (cucurbita), utilitarian gourds (lagenaria), and
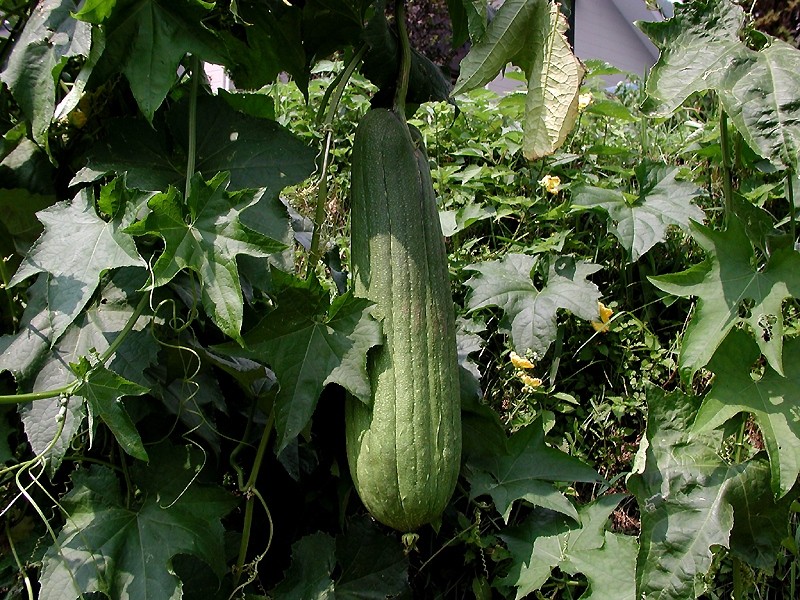
vegetable sponge gourds (luffa). Also consider including a few different kinds of edible gourds.


Ornamental gourds are brightly colored and oddly shaped, typically used as decoration.The have
orange and yellow flowers. Utilitarian gourds are green while growing, and then dry a brown shade.
These gourds are most often used for tools and utensils because of their tough shell. Vegetable
sponge gourds have a shell that can be peeled off, revealing a center that can be used as a sponge.
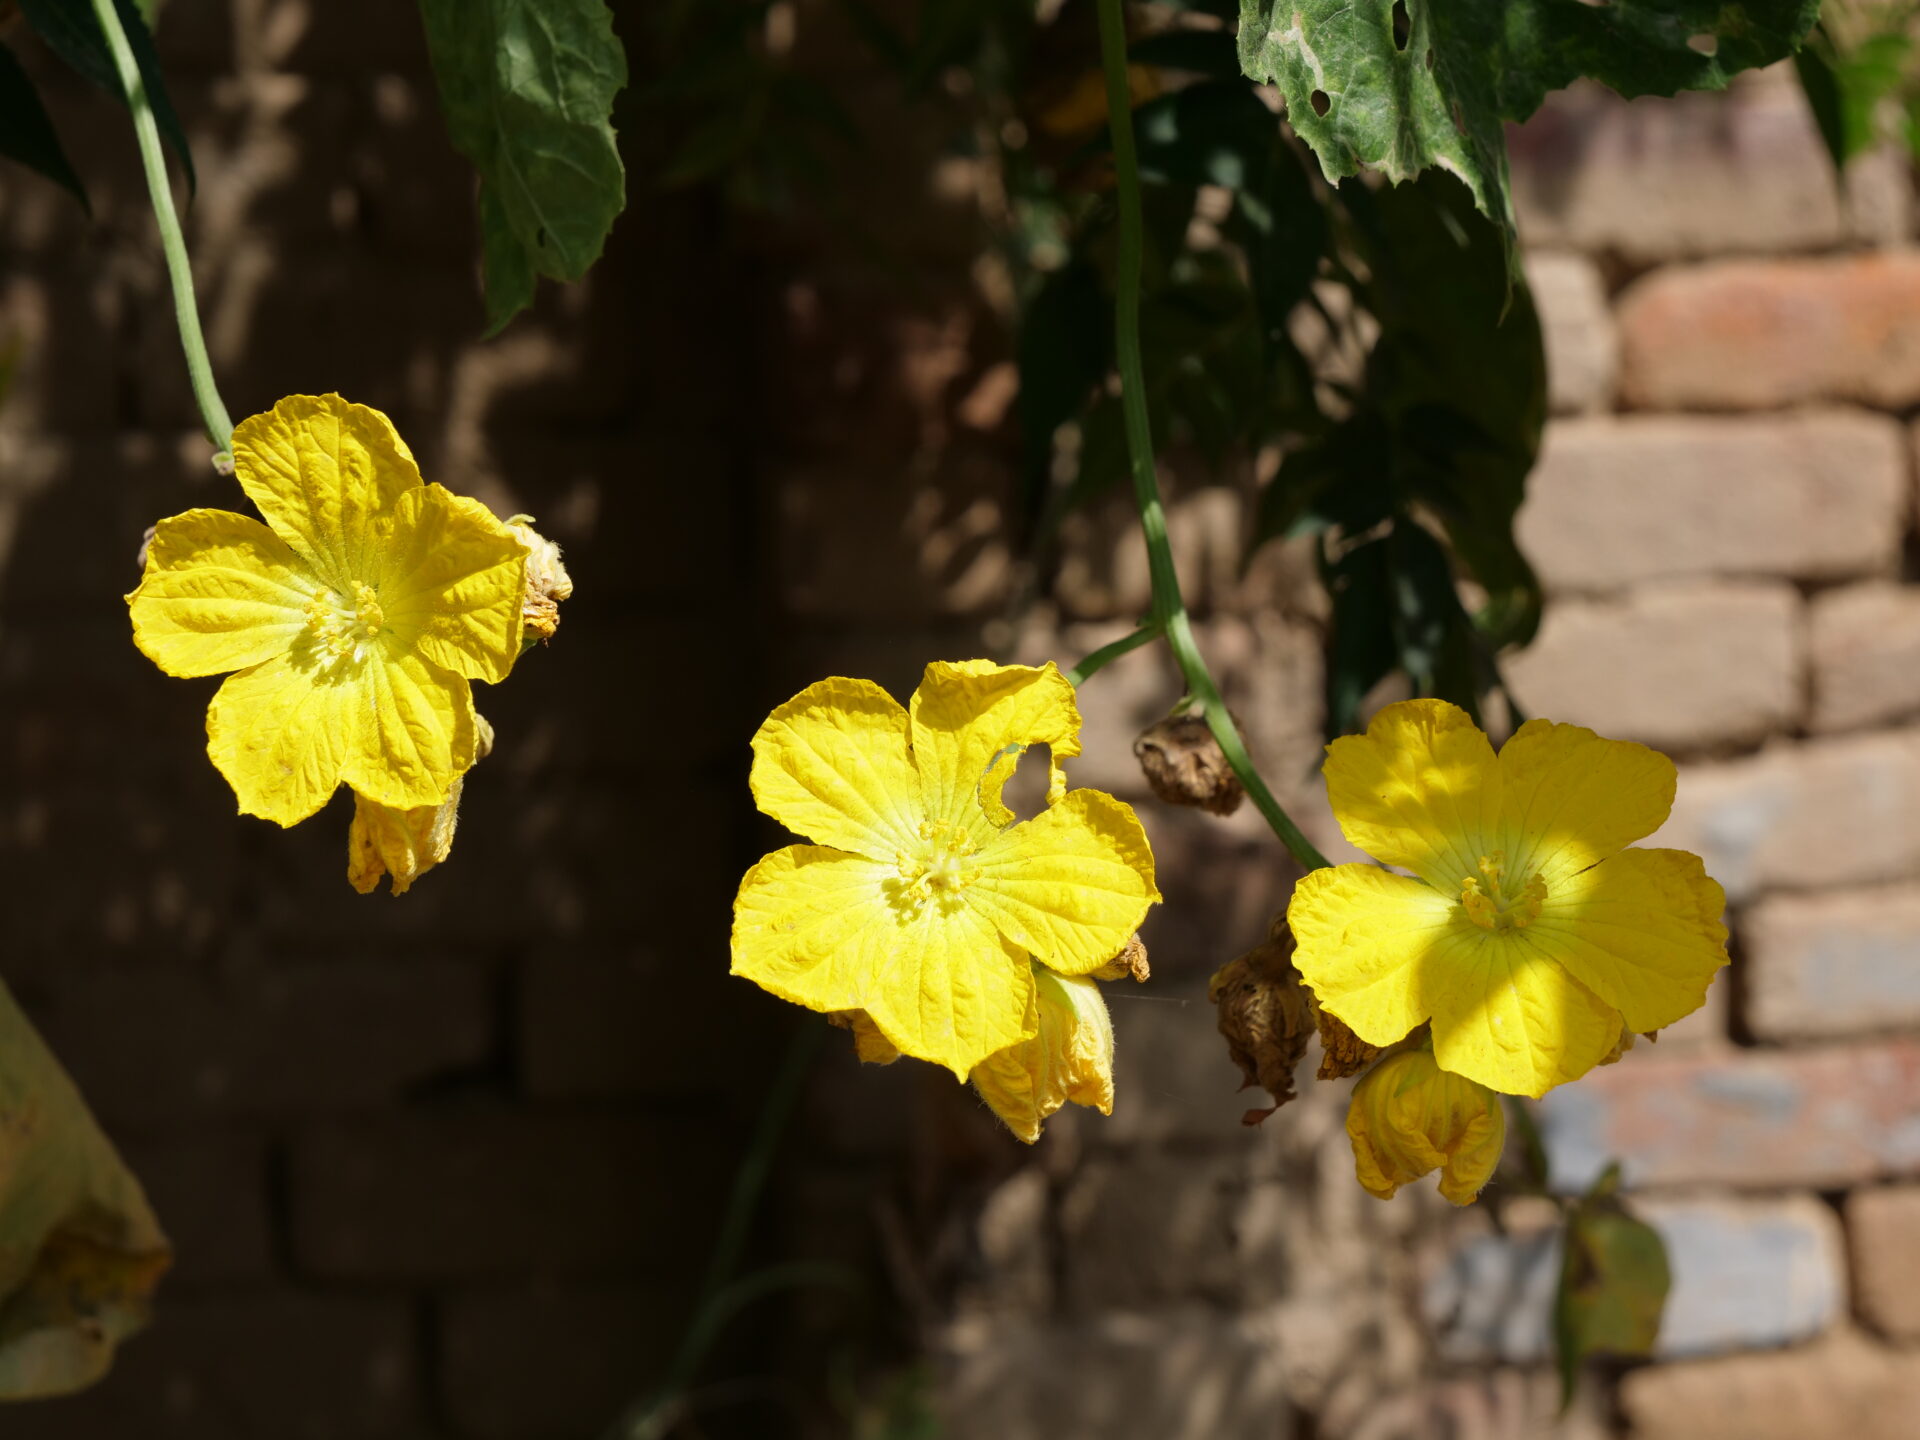
These have yellow flowers while growing. While not all gourds are edible, many are. You can eat
Butternut Squash, Cushaw, Festival Squash, Golden Acorn, and more. Some other edible gourds
include: balsam apple, Chineseokra, Hercules war club, and young Luffa.

Introduction
Mr. John Doe

Head Director

Description

Trellises are wood or wire constructs built to hold plants off the ground, and in the case of gourds, are used primarily to encourage unique shapes. You do not need a trellis to grow your gourds, as they will grow fine on the ground. However,gourds that grow on the ground will have a flat side where they lay, while gourds that grow on trellises will maintain their rounded shapes. If you decide to use a trellis, set it up prior to planting your gourds, and then stake the plants to it over time. Large, heavy varieties (like bottle gourds) will require a combination wood and heavy wire trellis in order to support them without falling over. Small gourd varieties can be grown using a large tomato cage as the trellis. Luffa (vegetable sponge gourds) almost always need to be trellised. Using trellises can help prevent your gourds from getting diseases. Gourds should be planted outdoors in full sunlight, with plenty of space to sprawl. Although they can be grown in pots, this will significantly limit their size and overall production. If you’re planting your gourds without a trellis, choose a space with plenty of square footage for growth. Otherwise, stake your trellis out in a wide area with plenty of sunlight and little shade.
Optimal Time/Temperature for Germination:
Gourds will grow in most climate zones, but they grow the best in hot weather. If you’re in a location that receives freezing temperatures throughout most of the winter, you will have to start your gourds as seeds indoors prior to sowing them outside. Gourds take about 180 days total from planting. Keep in mind that if you’re in a cold area, you’ll need to start your seeds 6-8 weeks before the last frost. Gourds grow best in temperatures between 75 and 85 degrees Fahrenheit. Starting gourds indoors simply involves planting the seeds in individual containers, setting up a few grow lights, and watering on a daily basis.
Optimal Soil Conditions:
Plant your seeds a least 8-10 feet apart in order to properly prevent diseases from forming and spreading. It isn’t too tricky to get soil under the proper conditions for gourds, which makes them easy to grow in most locations. The soil needs to be well-drained and warm. They like plenty of moisture with a bit more clay than sand (meaning they may not thrive in sandysoil). See if pH is somewhere between 5.8 and 6.4, which is the best range for gourds. If your pH is too high, incorporate peat moss to increase the acidity. If the air is warm but the ground is still cold, the gourd plants won’t grow well.
Seed Planting Depth, Spacing and Procedure:
Gourds are infamous for their tough outer seed shell, which is partly responsible for their long germination period. To prevent your seeds/gourds from rotting because they took too long to germinate, you can scarify them to speed the process. Use an emery board (paper nail file) or a smooth sandpaper to scratch up the outer surface of the seeds. This shouldn’t take too long; the rough paper should just roughen the coating of both sides of the seed. Then place them in a bowl of lukewarm water and allow them to soak. This should be done for a total of 24 hours, in order to help speed up the germination process. After soaking for 24 hours, remove the seeds from the water and lay them out to dry on a piece of wax paper. Giving them time to completely dry out will prevent them from rotting before even sprouting. It’s a good idea to give your seeds a head start (even if you’re in a warmer area) by planting them in starter sets indoors. Fill small seed trays with your prepared soil, and place a single seed in each slot. Give daily watering until you’re ready to transplant the sprouts outdoors, typically after the last frost of the winter. Make sure the seeds get plenty of light to keep them from getting too leggy (excessively long and straggly stemmed) later on. Use a small trowel or shovel to prepare your rows and hills, or small mounds of earth for the gourd seedlings. If you’re planting many gourds at once, make sure to follow the seed packet spacing directions strictly. Gourds typically need to be planted several feet away from each other in order to thrive. Keep your rows near your trellis if you’re using one. Place each small seedling or seed into its own individual hill; don’t group several in the same space. Cover up the seeds with ½ inch of dirt, and cover seedlings to the base of the new growth. You should plant the seeds horizontally and flat.
Best Companion Plants and Plants that Hinder:
Avoid potatoes but nasturtiums and marigolds are welcome with most vegetables.

Growing Instructions

Crop Maintenance

Moisture Requirements & Solutions:
At planting, water the gourd seeds heavily so as to reduce the risk of transplant shock. Gourds like plenty of moisture, so make sure the soil is damp by adding water on a daily basis if necessary. Give your gourds extra water when the weather is particularly dry or hot, to maintain a high level of moisture in the soil
Weeding Needs & Solutions:
Remove weeds as they sprout, as these will steal valuable nutrients and growing space from the gourds. If you’re using a trellis, as the gourds grow in size you can use a bit of string to secure them to the posts and give them plenty of room for growth. Add a layer of mulch to the garden plot to lock in moisture and block out new weeds.
Feeding Needs/Optimal Natural Fertilizers:
When the leaves die, simply cut them off; this will make room for new healthy leaves to grow. When leaves turn yellow that indicates the lack of chlorophyll, meaning too much or too little water. Unfortunately the plants do need to be fertilized, as most planting soil lacks essential nutrients.
Pests, Diseases & Solutions:
If insects on the flowers, remove them by hand, as using a pesticide will affect growth of your plant. Or, you can use soapy water or neem oil. Keep an eye out for insects such as cucumber beetles, corn earworms, aphids and stink bugs, as well as larger animals, including deer, mice, squirrels, chipmunks, and groundhogs. These are all considered pests, and can chew, eat, damage, and kill your gourds.
When to Harvest/Number of days to maturity:
If weather is suitable for the gourds with a long enough growing season (at least 120 days) you will get a good amount. When your gourds have reached their full size, the vine they’re growing on will start to die off on its own. At this point your gourds are ready for harvesting, but you’ll make the job a lot easier on yourself if you leave them to cure on the vine. Give them several weeks to a month for the curing process to occur; as you check in on them, you’ll notice them getting lighter and lighter. Unless you notice animals and bugs eating the gourds, there’s no fear of rotting or going bad. If you’re harvesting edible gourds, they’ll need to be removed from the vine when they’re still young. If you have to cut the gourds early, wait till the vine at the top of the gourd has turned completely brown and dry. Turn the gourds occasionally and move them around to keep them from touching.
How to Harvest:
The curing time varies from gourd to gourd depending on its size (and therefore water content). Check the gourds on a weekly basis to tell if they’re ready. Feel the skin and check the firmness of the gourds; if they are at all soft or squishy, they are rotten and should be thrown out. When the skin feels hard and slightly waxy to the touch, they are likely ready to be cut. Shake the gourd as the final test to see if they are fully cured; if they are ready,they’ll sound like a rattle with the seeds banging around on the inside. Use a pair of scissors or shears to cut the gourds from the vine.
Optimal Storage temperature and conditions:
Although it is not required, you can treat the shell of the gourd to change its appearance and to help it last longer. Wash the gourd with a bit of dish detergent and warm water to kill off any bacteria. You can then use a bit of sandpaper or steel wool to shine the outside of the gourd, and add a layer of wax or shellac to finish off the shine. You can decorate gourds by painting the outsides as well. Most will hang them with twine for curing so it’s less rotations to do. The process of treating a luffa (vegetable sponge) gourd is slightly different than ornamental and utilitarian gourds. To remove the shell you will have to soak it for 24 hours after curing. A malleable sponge will be found in the center when the shell is peeled away.
Optimal Preserving Procedures:
Seed Saving:
Your gourd will last for many years with the seeds inside, but if you would like to save the seeds for the next year’s planting, you may do so. Cut the gourd open to remove the seeds from the inside. You can keep the shell of the old gourd, and you’ll have the seeds to create plenty of new gourds as well.

Harvest and Storage

Notes

If you’re growing ornamental gourds, it is common for growers to train them into interesting shapes and structures. There are two general ways to train the shape of a gourd: bending over time, and by giving it a mold. You can slowly bend parts of a gourd as it grows, if you want a winding snakelike gourd in the end. You can also create a mold for your gourd by placing the small fruit inside a breakable vessel of some sort (like a vase). When the gourd has grown, it will fill the container and match its shape; you simply have to break the mold to remove it when done. *The gourd plant should produce both male and female flowers. The female flower will need to be pollinated by the male. Usually, bees or other insects do this. However, sometimes that doesn’t happen. You may have to step in and help by manually pollinating them by hand.

From the same Category

0 0 votes
Article Rating
Subscribe
Notify of
guest
0 Comments
Oldest
Newest Most Voted
Inline Feedbacks
View all comments

Contact to Listing Owner

Captcha Code
0
Would love your thoughts, please comment.x
()
x